
alternative uses for revit curtain walls. Other uses for revit curtain
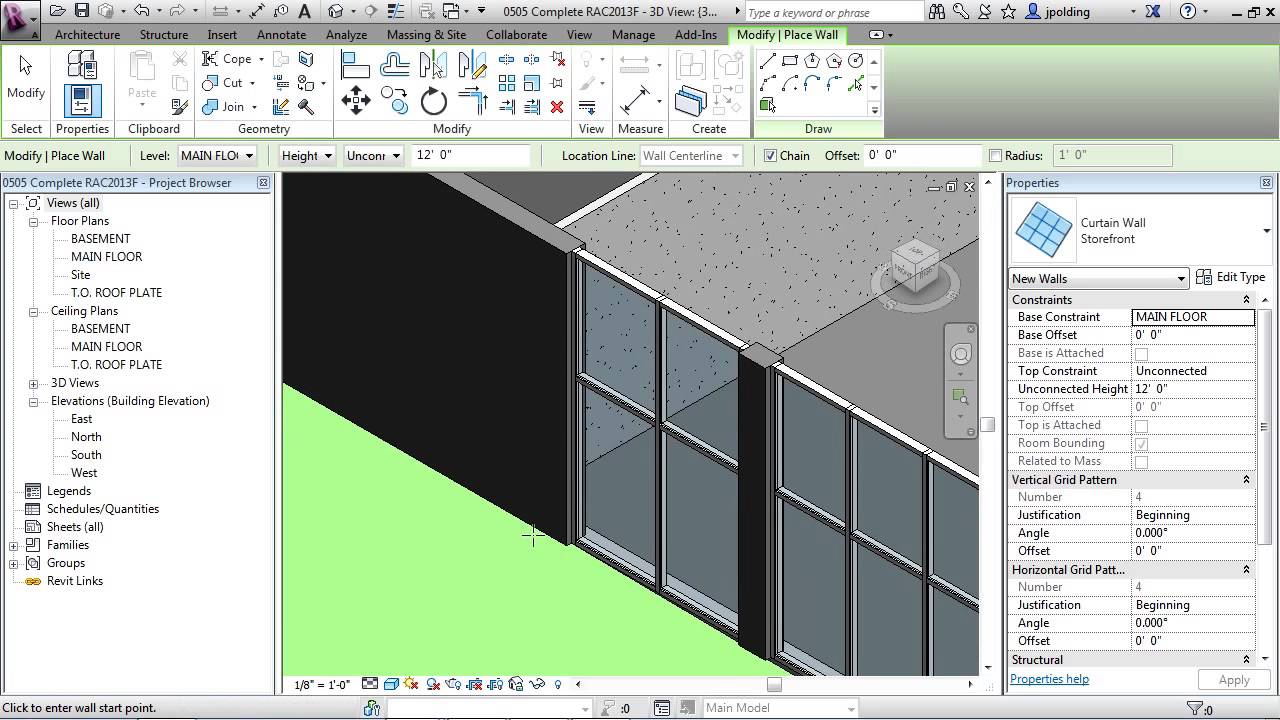
To create a linear curtain wall, add an architectural wall and select a curtain wall type from the Type Selector. Open a floor plan view or a 3D view. Where is it? Select a curtain wall type from the Type Selector drop-down.
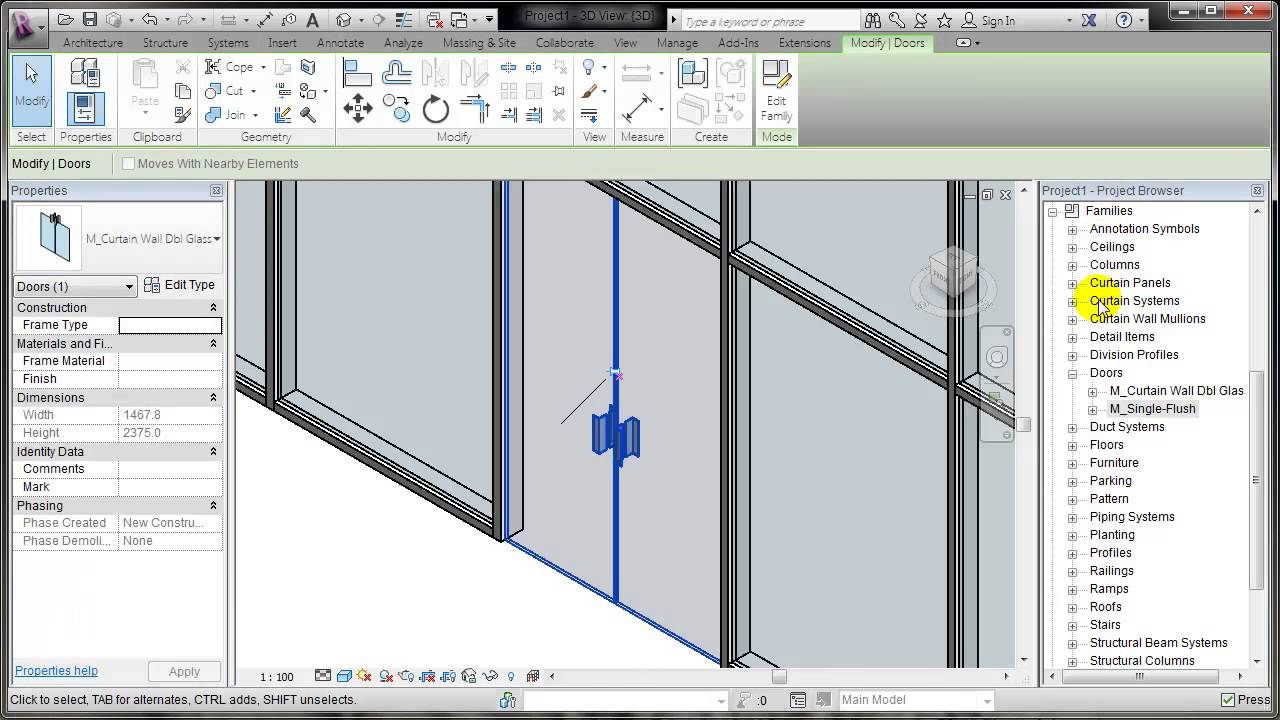
Revit Placing A Door In Curtain Wall You
Get these Project files and all Advanced 1h Courses:https://www.patreon.com/balkanarchitectTutorial on drawing walls in revit.How to draw simple walls in rev.
How To Make Curved Elevation In Revit Design Talk
Get these Project files, all Advanced Courses and 1 on 1 Classes:https://www.patreon.com/balkanarchitectSubscribe for more!Please Like this Tutorial!Follow m.
How To Make Concrete Walls In Revit
Steps. Go to the Modify tab > Geometry panel > click Paint (Shortcut: PT). In the Material Browser, select a material. Click on the surface of the wall you want to paint. Tips: Select multiple surfaces by holding down the Ctrl key while clicking. To remove paint, select the "Remove Paint" tool under the main tool and then click on the.

How To Make A Curved Curtain Wall In Revit 2019
1. Begin with a wall assembly of your choice. First, you'll want to get a wall assembly or two in a project for you to adjust and test out these features. If you don't have one in front of you, head over to BIMsmith Forge to create and customize some Revit walls for free.

How To Match Floor And Wall Color In Revit Viewfloor.co
View levels of support. How to create timber wall framing in Revit Follow video tutorials abailable in the network Timber wall framing generation in Revit.
How to Model angled slanted walls in Revit 2021 YouTube
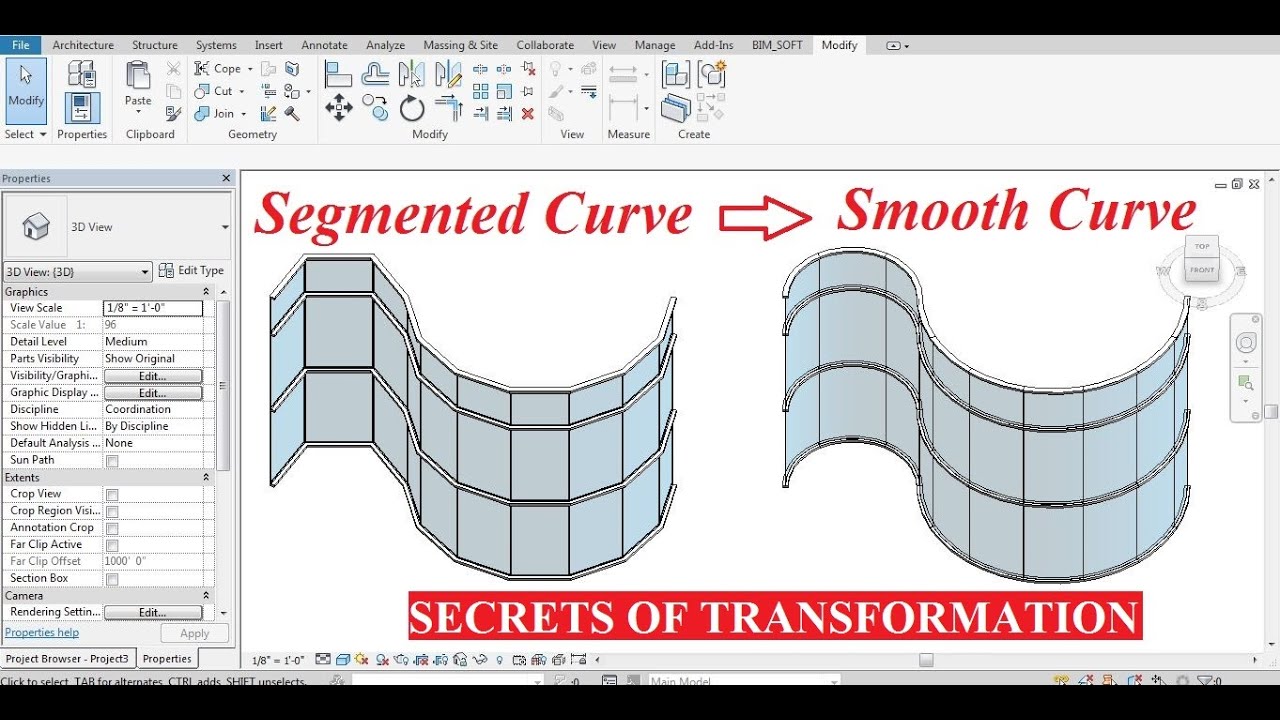
Steps. Within the Project Browser, open Level 1. Go to Architecture tab > Build panel > click Wall. In the Draw panel, select the Start-End-Radius Arc (or any other curving tool). Click once to start an arc, then click to assign an end of length. Drag the cursor to a direction, changing the radius of the arc.
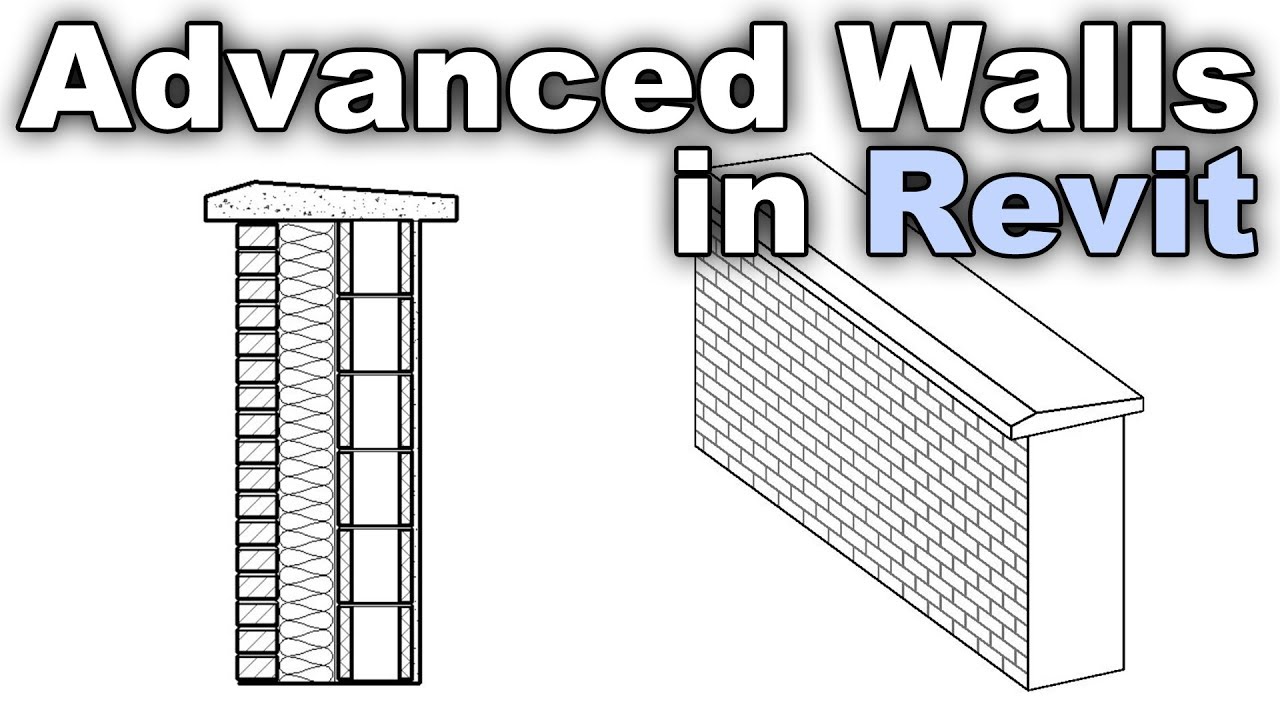
Advanced Walls in Revit Tutorial Dezign Ark
How to Create a Retaining Wall | Revit - YouTube © 2024 Google LLC In this video, you will learn how to model topography in Revit. It is pretty simple in that it is used with topography.

Walls in Revit Tutorial YouTube
This video demonstrates the following: Add exterior walls by using selected points. Add interior walls to the lower level using the Wall tool. Use the Trim/Extend tool to create an opening for a corridor. Note: This video was recorded using Revit 2020. When performing the procedures, you may notice minor differences in functionality and user.
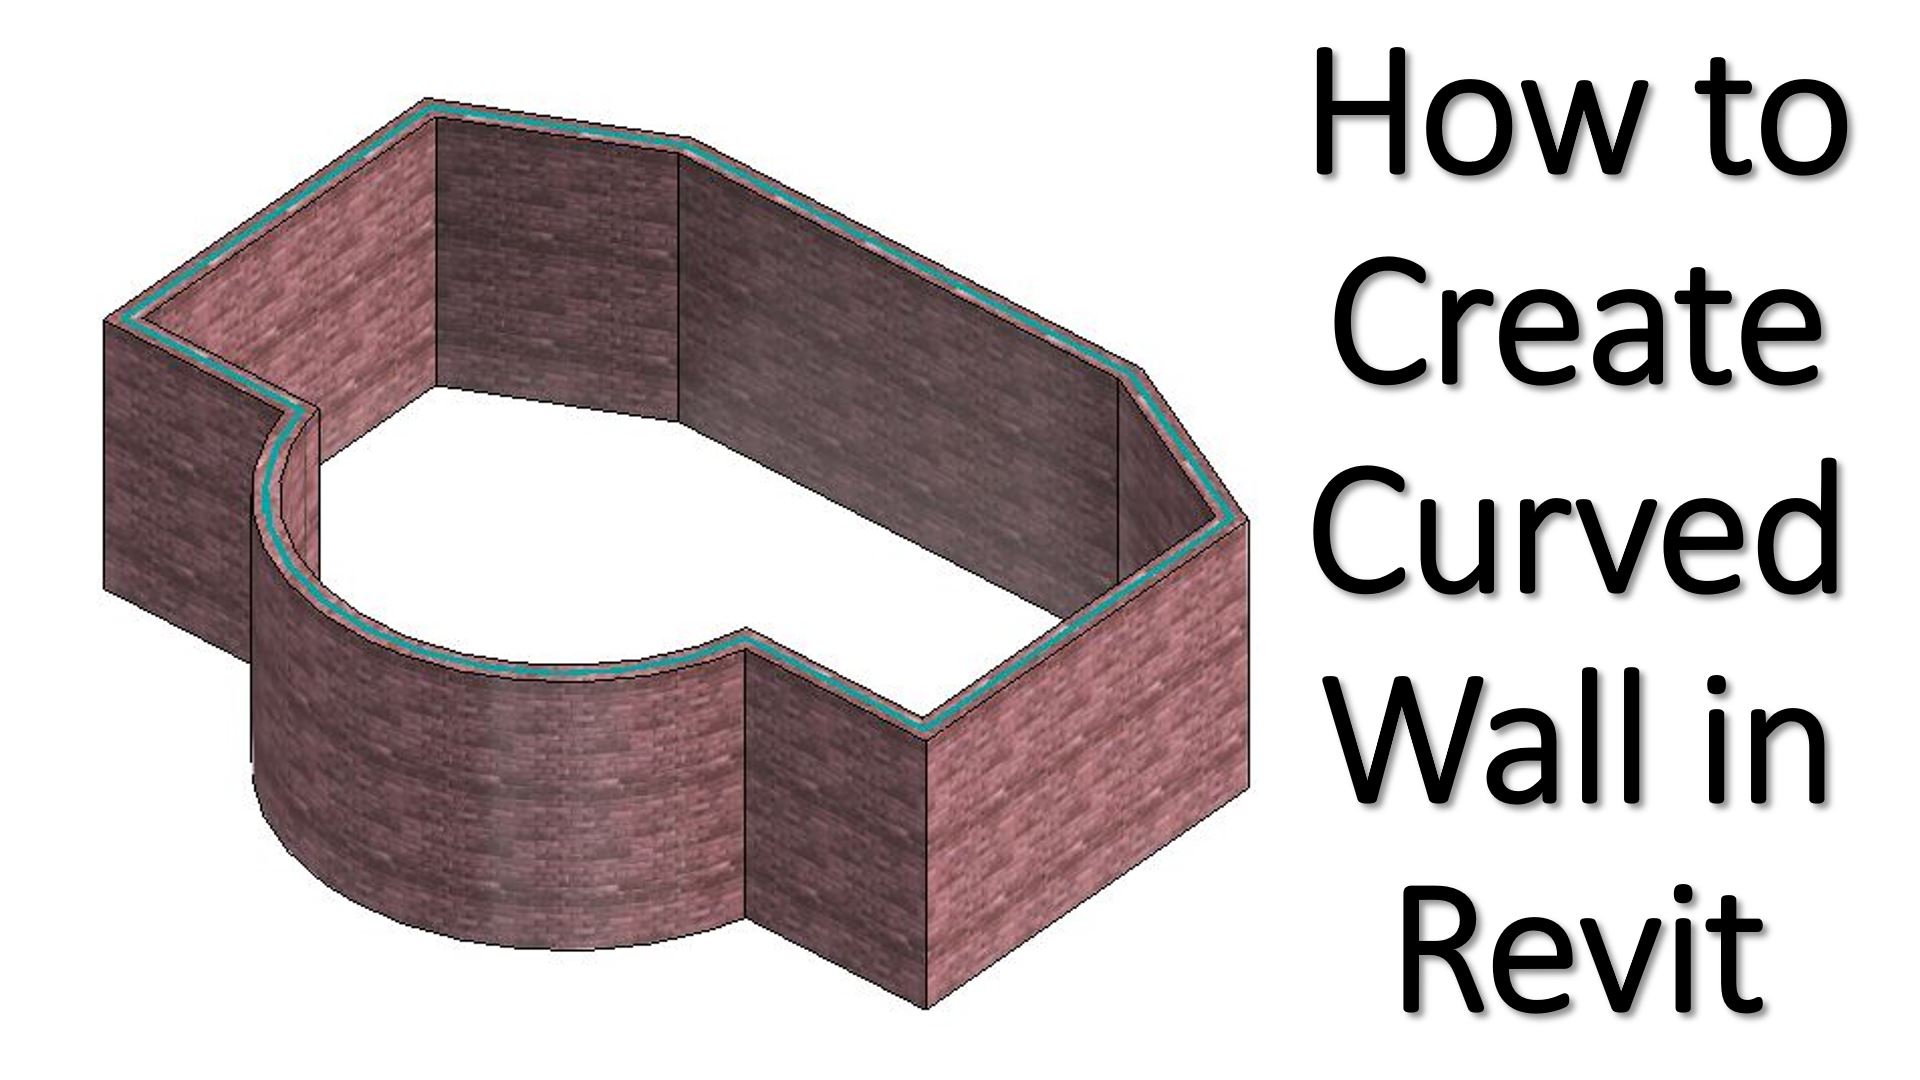
How to Create Curved Wall in Revit
Get these Project files, all Advanced Courses and 1 on 1 Classes:https://www.patreon.com/balkanarchitectSubscribe for more!Please Like this Tutorial!Follow m.
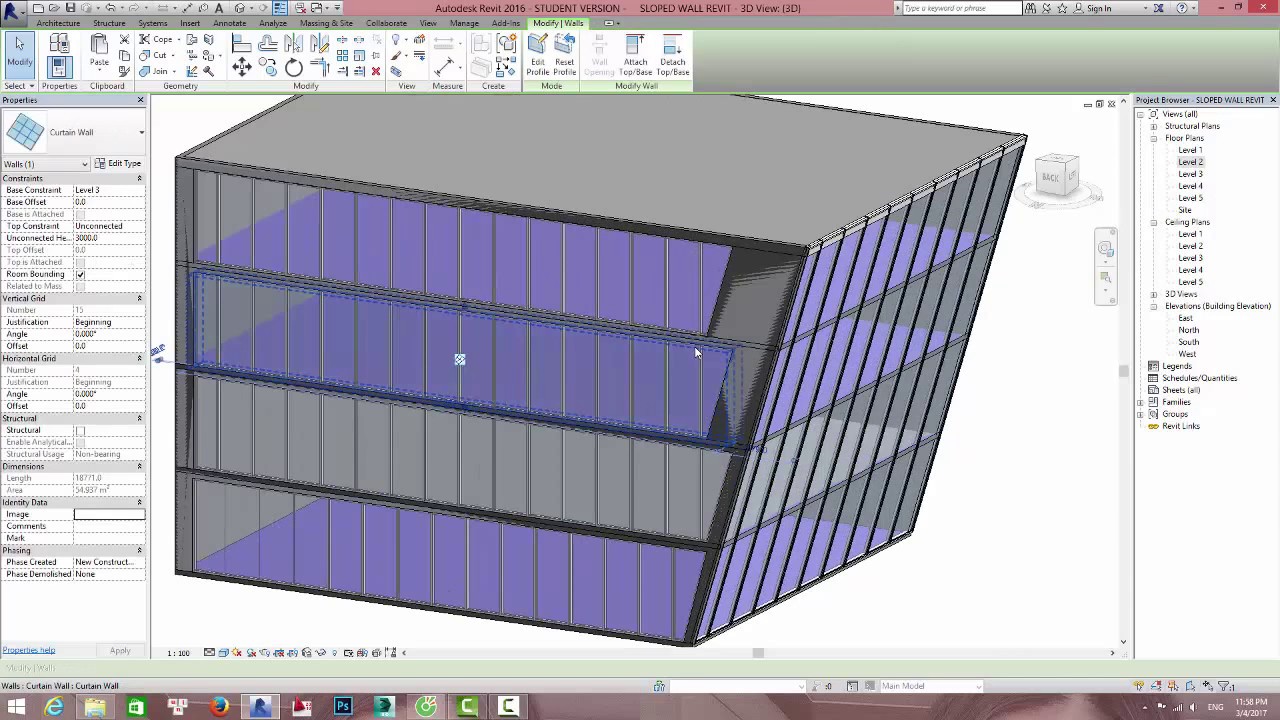
Sloped Curtain Wall Revit
8 Share 9.5K views 1 year ago Office Hour Sessions On this episode of our Office Hour Sessions series, community member Emil asks a question about how to create concrete panel walls in Revit..

Curtain Panel Revit Tutorial
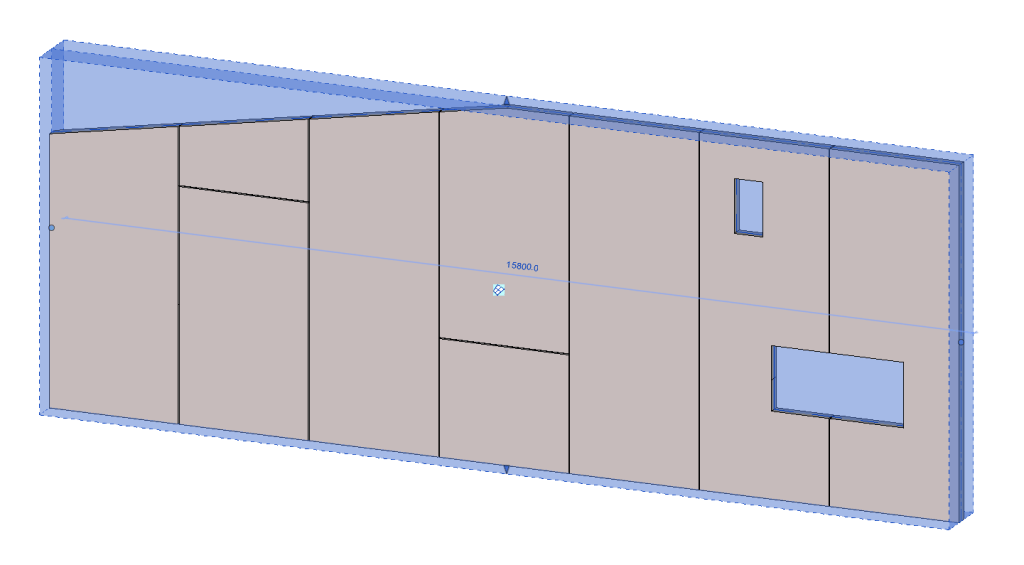
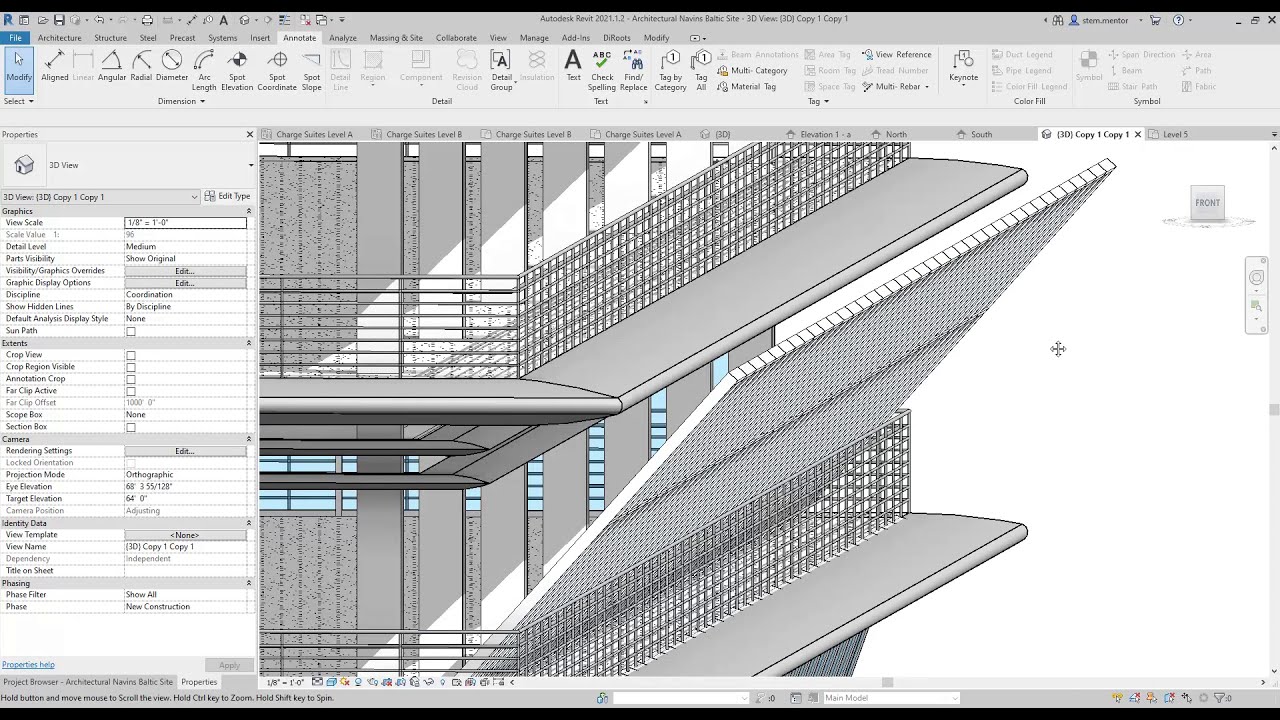
Here's the process in Revit 2021. Select the wall and go to its properties. Change the "Cross-Section" parameter to "Slanted". Adjust the Angle from Vertical as desired. Doors and windows have a new "orientation" parameter which allows you to select "Vertical" or "Slanted". (Although I'm sure slanting a door would NOT.
How To Put Curtain In Revit
Create a new multi-layer wall type and assign a material, function, and thickness to each layer. Substitute all external walls of the same type with the new wall type. After completing this video, you'll be able to: Create a new multi-layer wall type. Add materials to layers. Modify the function and thickness of layers.

Revit Wall Families
1. Edit the construction of a wall, and add a 2D profile as sweep. 2. If desired, define the material. 3. To preview the result, switch to Section view. Freely model the wall from an inplace family whose type is wall

Slanted Curtain Wall Revit
Open the Architecture tab > Build panel. Click Wall (default shortcut: WA) Go to the Type Selector in the Properties Browser and click on it. Select a predefined Stacked Wall. Click on Edit Type. In the Type Properties dialog, you can Duplicate the existing type. Give the new Type a Name > Click OK.

More Basics with Revit Walls Profiling Your Foundation Walls Synergis®
This video will show you how to create a simple wall and a compound wall in Revit.
